Monday, January 18, 2010

Thursday, January 7, 2010

My Ideas for "how to?"

How to make it healthy???

1. who am I?- I am Specialist(healthy)
2. what is that?- take care of ours body
3. what for?- protect our body
4. 1st task- do what exercise to protect body
5. 2nd task- what kind of food can help us
6. 3rd task- how to arrange it(time)
7. conclusion- effect of the body
8. showcase- gallery


How to "baking"...???

1. who am I?- Baker
2. what is it?- Bread and Cake
3. what for?- satisfy for consumer
4. 1st task- buying material
5. 2nd task- baking
6. 3rd task- let consumer choose flavor and variety
7. conclusion- comment from all consumer
8. showcase- gallery


How to relax...?

1. who am I?- Tourist guide
2. who is them?- traveler
3. what for?- introduce them where is the best place to travel
4. 1st task- viewing for the map and point the place out
5. 2nd task- show all the photo of travel scenic spots
6. 3rd task- set up the package and fees
7. conclusion- how traveler enjoy it?
8. showcase- gallery

Tuesday, January 5, 2010

Web design (Research)

Web design (Research)
 
1. http://snopp.no/portfolio


2. http://www.mauriciostudio.com/


3. http://www.kitfolio.com/


4. http://www.edelwwweiss.com/index.html


(Research) Photoshop & Illustrator Tutorial

"Old halftone print effect"

http://www.photoshoproadmap.com/Photoshop-blog/2007/09/13/give-your-photos-a-retro-comic-book-effect/ 


Step1 
Now we are going to increase the overall contrast of the picture by burning it a bit. Go to IMAGE > ADJUSTMENTS > LEVELS…With this image we are going to set the INPUT LEVELS to 60 / 1.00 / 220.


Step2
In this step we are going to give the photo an illustrated look with some graininess to give the illusion of an old and bad quality paper. It is not a realistic effect, it is just some distortion to the image to help us achieve the final look. Go to FILTERS > ARTISTIC > FILM GRAIN. In this case we are going to use: GRAIN: 4, HIGHLIGHT AREA: 0, INTENSITY: 10. Try different settings for different photos. 


Duplicate the layer and name the new layer HALFTONE

Step3
In this step we are going apply a halftone pattern to the image to give the final old comic book printing effect. Go to FILTER > PIXELATE > COLOR HALFTONE. Set MAX RADIUS: 4 and leave the rest with the default values. Press OK and then go to the LAYERS PALETTE and set the BLENDING MODE to DARKEN.


Final

(Research) Photoshop & Illustrator Tutorial

"Drawing from a reference photo"

Step 1
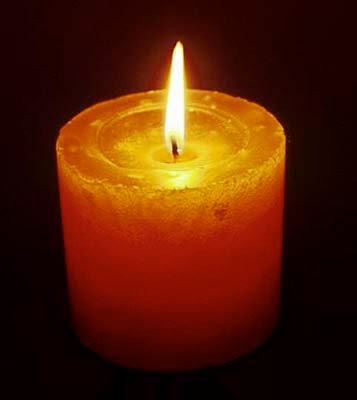
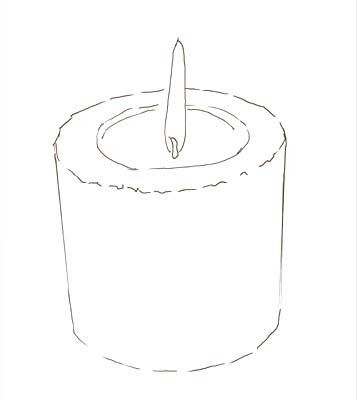
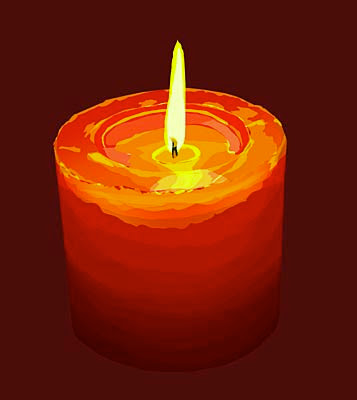
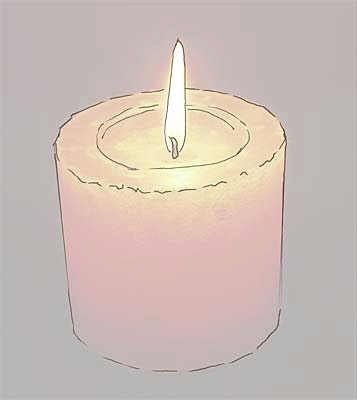
Tracing the outline of real photo.The Tracing: First step is to create an "onion skin" by adding a white layer above the bottom reference photo layer and setting its layer opacity down a bit so that the image can be seen through the white layer. Next I create a blank layer above the white "onion skin" layer to use for tracing the position and outline of the candle. It is important to make the tracing on a separate layer and NOT on the onion skin layer. This is not meant to be a detailed drawing in any sense... just a rough sketch showing where the major color areas and important perspective and detail elements are located.
Step 2

Once the rough sketch is completed, I return the opacity of the onion skin layer to 100%. By this time, I've also printed out a good quality print of the reference photo to "eyeball" for building up the picture's color and
definition. From this point on, I don't use the bottom la
yer anymore, just the reference print out. Step3
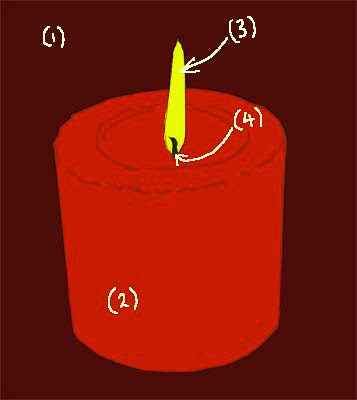
So let's begin. For the candle, I create four more layers for the dark red background color (1), the bright red candle (2), the flame (3), and the wick (4). Yep, that little wick gets its own layer. The lasso tool: To fill in the color, using the sketch lines as a guide, I use the lasso tool to define and fill the major areas of color on each layer. The lasso tool is, in fact, about the most important tool I use throughout the development of the image to define areas to manipulate, to change or modify, to do whatever. The lasso tool is my drawing tool supreme. I draw with the lasso tool... I define with the lasso tool... I do just about everything with the lasso tool... hope I've made my point... I love the lasso tool... :)
Step4
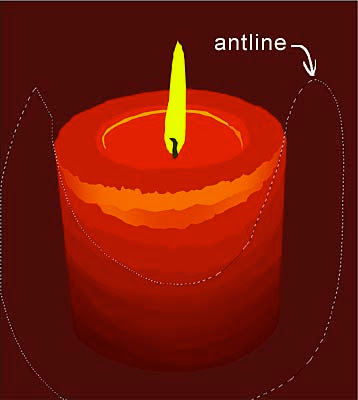
Of course the lasso tool is nothing by itself... it has to be used in conjunction with adjustment and fill tools like levels, color balance, contrast, and hue/saturation, I have a number of actions set up to help with these combinations. For example, after I've selected an area to manipulate (using the lasso tool to select an area which is then defined by the "antline"), I have an action assigned to my F2 key. When I press that key, the levels dialog box pops up. After I've made levels changes and hit the OK, the action next brings up the color balance dialog box so that I can make color adjustments if needed. Sure does save a lot of time, those Photoshop actions.
Step5
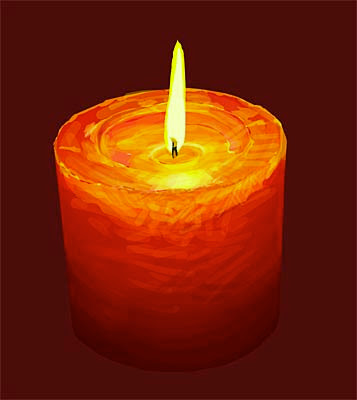
On the reference photo, continue to lasso areas of the candle and make appropriate changes in level, color and hue/saturation.
Step 6
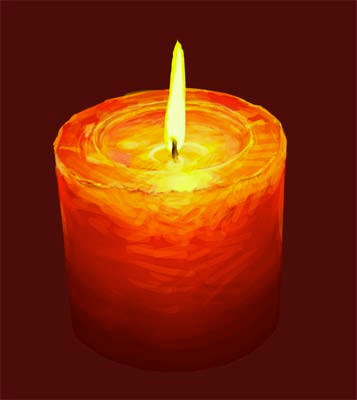
The Pencil Tool: Now the image is starting to come together. I begin using the pencil tool at varying pixel widths. I generally have the size and preasure set to "stylus" and the opacity set to either 33% or 66%, never 100%. Step7
Getting Reckless and Spontaneous: One of the tricks that I use quite liberally at this point is to work with the pencil tool on a new layer just above the layer that I intend to add color or drawing to.
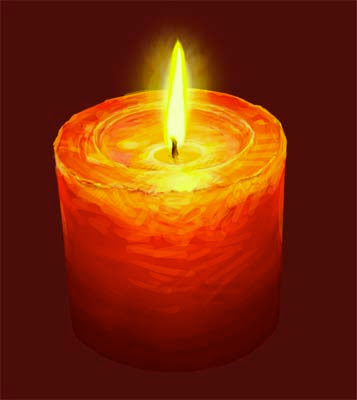
Final
After doing a bit of work on the flame and wick layers, I add another layer just below the flame layer. That layer is for the flame glow and is highly feathered and set to a layer opacity of about 50%. And finally, after a tweak here and there, it's done.

Monday, January 4, 2010

(Research) Photoshop & Illustrator Tutorial


"Make it wonderful"

http://www.onlyphotoshop.com/tutorial/basic-model-retouching/7/

Step 1
In this first stage we will give more color to the hair and face. First duplicate the Background layer.
Layer > Duplicate Layer - Name it "Blur"


Step 2

Blur a little: Filter > Blur > Gaussian Blur > Radius = 5 px
Change the layer to Soft Light mode with a 75% transparency. This brings a better definition of the image and recovers the color a little.


Step 3

Above the Layer Background make a new layer to finish giving life to face.
Fill this layer with the color 75,25,25 using the Paint Bucket tool. Then change this layer to Soft Light mode with 75% transparency.

Step 4
Eyes and Lips...
Up to now really looks very well, however their eyes get lost a little, the same as their lips.
Make a new layer, above the layer "blur", name it "lips".
Use the Zoom Tool to increase the area of the lips and use a paintbrush of the appropriate size to paint the lips with the same color: 75,25,25.
Begin marking the contour with a thin paintbrush, then fill with a wider one.


Step 5
Change the layer lips to Soft Light mode and like magic art some succulent lips appear.

As you will see, there is a small clear point in the left corner lips, also another close to the center of the inferior lip, something that seems like a grain.


It is necessary to correct this with the Clone Stamp tool at 50 - 35%. Sampling (pressing the Alt key, and clicking with the mouse) fair to the center of these two imperfections. All this on the Background layer.


Step 6

The lips are ready, now lets go for the eyes, she will use blue color eyes, blue as the sky to where she belongs.
With the Heliptical Marquee tool make a selection that adjusts around one of her pupils. Go to Selection > Transform Selection to adjust as much as possible to the pupil.

Selects the white color and fill the selection pressing Alt.+ Delete.
Once its full, with the Eliptical Marquee tool drag the selection to the other eye (not in all the cases it is the same diameter) and also fill it.

Deselect by Pressing Ctrl + D.
Then load again the selection, but now of both eyes.
Select > Load Selection - Channel = eyes Transparency
Now its time for color: blue. Image > Adjust > Hue/Saturation - Colorize - Hue = 220 - Saturation = 100 - Lightness = -20

Final

Deselect pressing Ctrl + D. Then take this layer to Soft Light mode and adjust its transparency value if you decide to decrease the color intensity.
And she is Ready.